adam patrick bell
  • About
  • Blog
  • CV
  • Music Reel (password required)
    • Commercial Music
    • Film Music
    • Popular Music

mistec instructions

7/22/2016

1 Comment


Soundtrap premium free for 2 months: https://goo.gl/zPBU1p 

Activity 1 (DIY for laptops/desktops. Tablets, Smartphones, and those looking for less steps: scroll down further)

1. Get your WIFI-enabled instrument!  (or partner up)
2. Go to Soundtrap.com (use Google Chrome if possible)
i. sign up or sign in
ii. Choose ‘enter studio’
iii. Choose ‘blank’ template
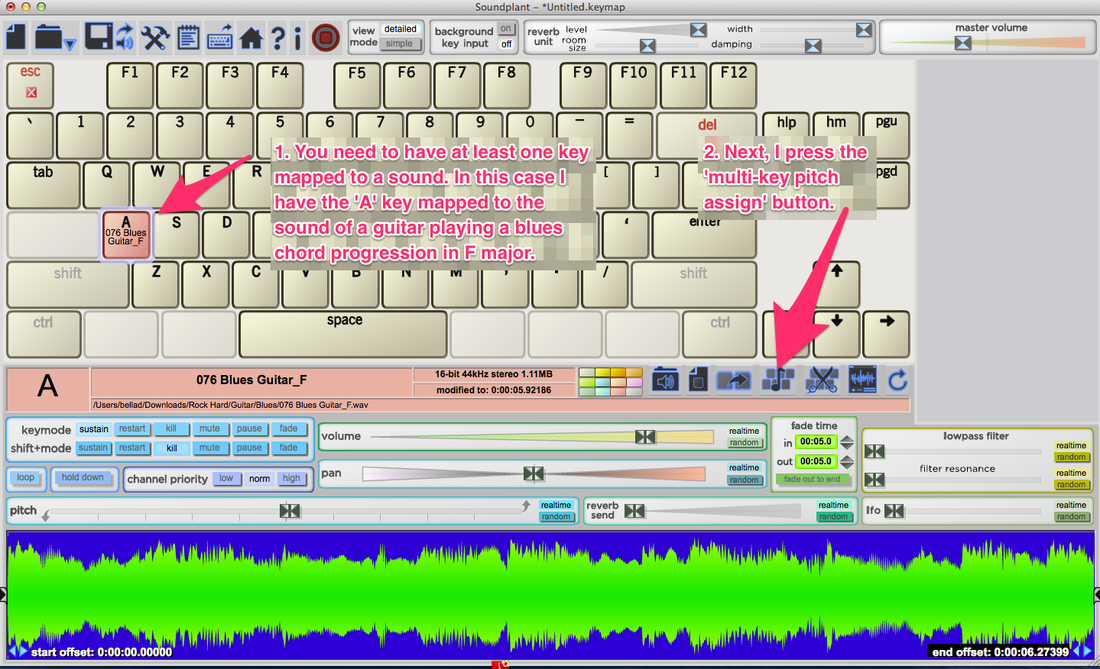
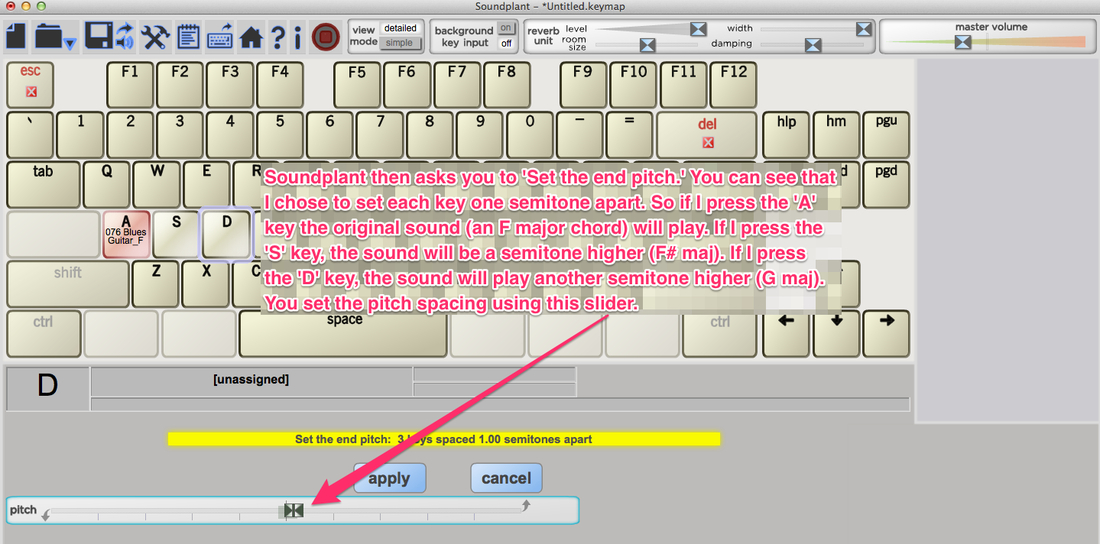
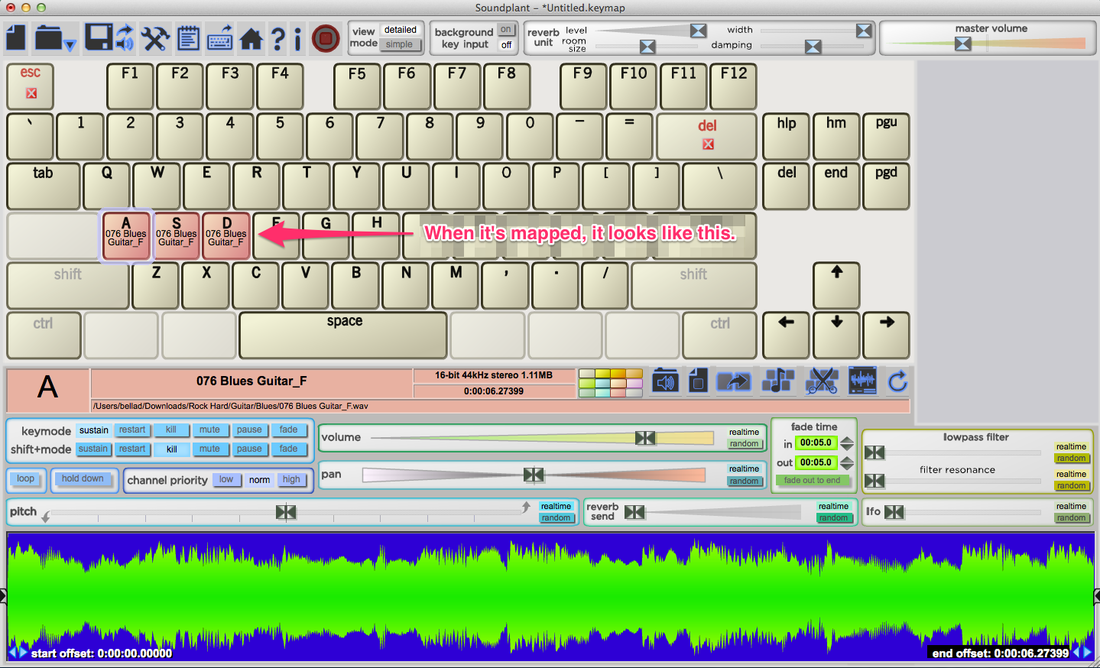
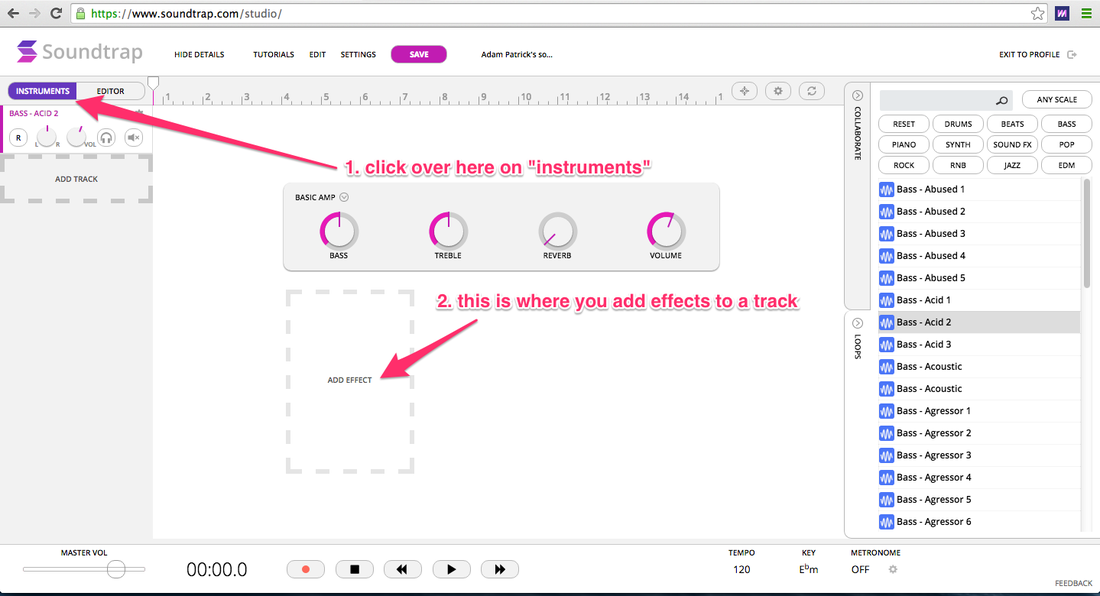
iv. Choose ‘add instrument’
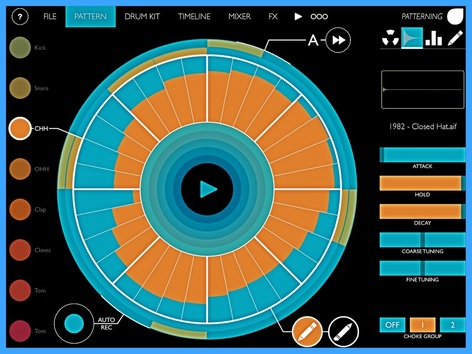
v. Choose ‘piano & keyboards’

3. Open a new window in your browser
i. Go to http://www.trachtman.org/rollscans/
ii. Download a MIDI file (try searching by a composer or performer, like Gershwin)

4. Drag this MIDI file onto the track you created in Soundtrap

Tablets, Smartphones: Click one of the links after you've signed up/signed in for soundtrap.com:

i. Gershwin
ii. Gershwin 2

Activity 2 (Again, dragging does not work with tablets/smartphones, but I've provided a link at the bottom of the section as a work around)

1.Go to midiworld.com or a similar site and search for a MIDI file of a popular song you’d like to try remixing 

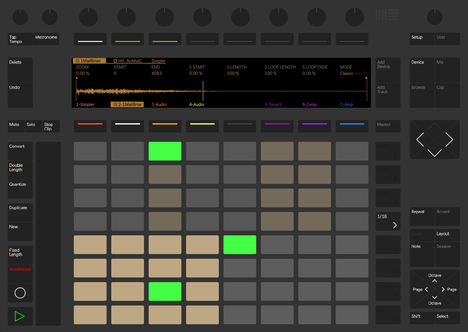
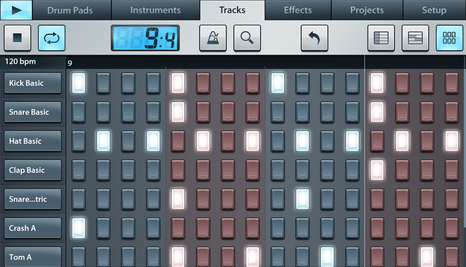
2.Drag this MIDI file into a new session/song in Soundtrap. It may consist of multiple tracks

3. subtraction strategies: 
  •  Melodic and harmonic tracks by muting or deleting them
  •  Sections of the song by splicing and deleting
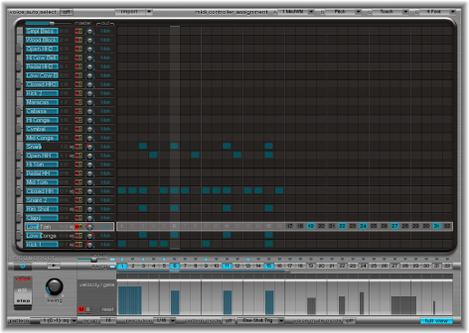
  •  Single notes, passages of notes, etc. by deleting them in the piano roll

4. additive strategies:
  •  Premade drum and percussion loops (or try out groove pizza)
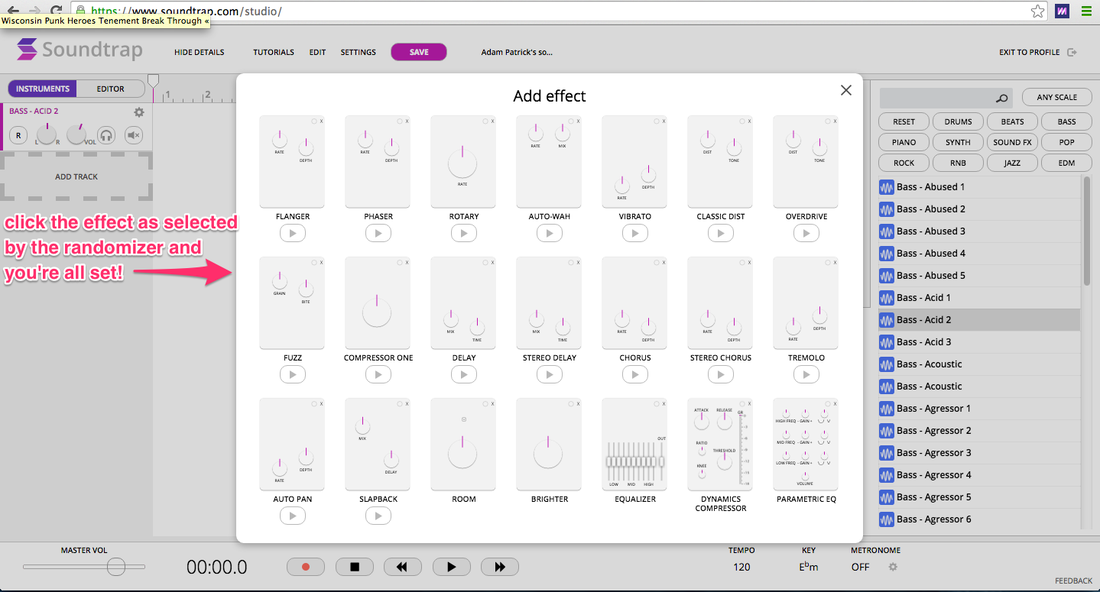
  •  Audio effects
  •  Sound effects (try sound dogs)
  •  new hook(s)

​i. Taylor Swift - Shake It Off
ii. Journey - Any Way You Want It
1 Comment

the learning (b)log

4/17/2016

1 Comment

 
Any student that takes a class with me involving music technology is required to maintain a blog, and they're graded for doing it. In short, they're assessed on assessing themselves. When I initially present this ongoing assignment to my students I tend to field the same concerns and questions, so I finally wrote my down my responses as a brief guide. 

the learning (b)log​

Reflection is a critical aspect of learning. To facilitate this process, every week we will individually answer the question, “how's my learning?” in our respective learning (b)logs (That’s a silent “b” in case you’re wondering). I recommend using either Tumblr or Wordpress because previous students have told me they're easy to use, but any platform that you can update and provide a link to is acceptable. 


Q: Why am I doing this in the first place?
Picture
A: First, we can enhance our learning by reflecting on it. In the case of most new learning experiences, this becomes apparent really fast. One day you'll be confused, and another day it will make sense, and this can happen without looking at a screen because it's about the bigger concepts, not the clicks, key commands, code, etc. Most of that knowledge can be retrieved from google in seconds, but concepts, especially the new ones you create, are much more complex and therefore can take some time to grasp. Can you do this without a blog? You bet, but there's no way for me to know this unless you communicate it to me. 

Second, you need to learn how to learn. Circular concept, yes, but true nonetheless. Having to do a weekly blog gets you in the habit of reflection and hopefully this becomes automatic for you eventually. Just as you practice your instrument, you need to practice learning how to learn. This will become increasingly critical as your life gets busier (it will trust me!) and therefore you need to become more efficient and focused in your learning. 

Third, Paulo Friere, known for his critical pedagogy, specifically for his book Pedagogy of the Oppressed (super easy to find a free pdf online), wrote that learners must take agency for themselves. He has this great analogy of the didactic approach to teaching as a banking model. His point was that learners aren't these empty vessels you fill up with knowledge. Learners must have a voice in their own learning process. We'll have lots of discussions in class, but the blog provides another kind of voice for you because it's a different medium.

Fourth, this helps me a lot, and therefore should help you a lot. This relates to the aforementioned point, I'm not here to drop some knowledge on you in a prepackaged way. I'm here to bend to your various wills. It may not be graceful, but following a prescribed formula will undoubtedly lead to formulaic music and that's not what we signed up for. 

Fifth, this helps your peers a lot, and your peers will help you a lot. These learning (b)logs are shared amongst the class, and by reading each other's blogs we can learn from and help each other. 

Sixth, at the end of the semester you won't need to take my word for it that you've learned a lot because you'll have created your own easy-to-follow trail of evidence, hence the name: learning (b)log.

​Q: What do I have to do?
Picture
1. Write in the neighborhood of 300 words (min. 250, no maximum). Why specify length? I've found in the past with other students that it's extremely difficult to articulate one's thought processes with meaningful depth in fewer words. I've arrived at this number through trial-and-error, and it's sufficient to satisfy "thick description." What is that you say? Ah, our next point...

2. Thick Description. 

The thick description has the following features: (A) it gives the context of an action, (B) it states the intentions and meanings that organize the action, (C) it traces the evolution and development of the action, and (D) it presents the action as a text that can be interpreted. A thin description simply reports facts, independent of intentions or the circumstances that surround action. (Norman Denzin, 2001).

The point is to contextualize what you're thinking about. Writing that "this is difficult," is a start, but it's not going to help you or me if we don't unpack that and try to specify why.

3. What are you working on? This shouldn't be too difficult to do. Simply describe the assignment you are currently working on.

4. What problems have you encountered?
​
With regard to what you wrote about in your description, write about what's making you do this:
Picture
5. What successes have you had?

It's not all bad though, right? Even when it seems like your project is problematic, we need to try to focus on the positives, specifically the concepts that are realizable. Often the issue is not with the concept itself you're trying to realize, it's making it work with the technology you're using. What we're trying to do is problem solve how to get there step-by-step, and some of those steps will be missteps. Account for your steps, which ones do you think are good? Are parts of your approach working? Great, write about it. Feel free to upload works in progress or take screen shots if it helps to explain your progress.
Picture
Concern: I don't want my learning (b)log to be public.

A: The lo-tech solution is give yourself a pseudonym. I suggest Mark Wahlberg. If a private blog is really what you're after, both Wordpress and Tumblr provide ways of doing this.

Wordpress:
https://en.support.wordpress.com/settings/privacy-settings/

Tumblr:
https://www.tumblr.com/docs/en/blog_management

That said, learning (b)logs are meant to be shared amongst the class so that we can see what others are working on and learn with and from them. The learning (b)log is not intended to serve as a personal journal, so there's no need to include information you consider to be private and/or confidential. 

Tip for Teachers: Give a weekly prompt. Those new to blogging often remark that they simply forget to do it. I've found that sending out a message to the class to remind them what we have worked on and providing a few possible points to ponder helps them to keep at it. 
1 Comment

Song Exploder Assignments

3/8/2016

1 Comment

 
Picture
Like a lot of people I really like the podcast Song Exploder and decided to try out a couple of new assignments related to it this semester. I currently teach college music students, but I'm sure these assignments could be modified (and reworded) to work for younger students.

Assignment 1: Song Exploder Episode Explication

The idea behind this assignment was to serve as a primer for Assignment 2. Our class frequently focuses on production, and Song Exploder provides a window into how musicians use technology for musical ends. The studio—broadly defined—is the instrument of the 21st Century musician, and Song Exploder episodes tell us about how they play it. If we want to be like the musicians we look up to, we need to do what they do. 

Skills Called Upon: Peer teaching, public speaking, critical listening, audio literacy, summary and synthesis of the "text" (in this case an audio text).
 
Instructions to Students: We will each call dibs on an episode of Song Exploder and become experts on our chosen episodes. In class you’ll play the piece of music analyzed (if the selection is more than 5 minutes we may need to play just an excerpt of it) and draw our attention to what you think is the most salient aspect of this piece of music’s production based on the dialogue portion (the explication) of your Song Exploder episode. Note: In what order this is done is up to you. 

It may be helpful to think of yourself as a guide in this exercise, you’re trying to point our attention in a specific direction. Tell us what to keep an ear out for and then explain to us how it was accomplished. This may require a little extra research such as looking up what the technology used does, looks like, or costs (or whatever you deem relevant), but keep in mind that this is just a short exercise to whet our appetites; we don’t need the whole buffet.

Example: In my opinion (and yours may differ) the most salient aspect of the Björk episode is when she mentions audio editing as musicianship:
Clearly, in Björk's case editing constitutes the musical action she engages with most. The takeaway is simple, but significant: we should perceive editing to be musical and we can expect to spend a lot of time editing if we aspire to be like Björk. 

Assignment 2: Implode/Explode

Listening to Song Exploder episodes is a great education, but making your own Song Exploder episode is a better education. Surely, the person with the best grasp of an artist's working processes featured in Song Exploder (aside from the artists themselves - and that could be debated, too) is Hrishikesh Hirway because he makes the episodes. By sifting through the interview files and editing them down to create a cohesive storyline you're essentially making an argument based on the evidence you have. 

At the risk of stating the obvious, this assignment can only work if students make music that they can later "explode." My class spends the first half of the semester working on an assignment called The Song Machine based on the work of John Seabrook (see the previous post), so by the time they get to this assignment they have something they've worked on that they can "explode." 

Skills Called Upon: There is so much skill development in the different processes of this assignment, but broadly speaking they fall under the umbrella of production/composition (especially editing). This is a great opportunity to discuss with students what the ever-evolving role of production entails.

​Instructions to Students: If “exploding” is the dissection of a piece of music, then I suppose “imploding” (def. ‘bursting inward’) is the process of putting it together (I like the image of music creation being this inward bursting of musical ideas). Anyway, the point is that in the first phase of this assignment--implode—you’ll make some music using the studio as instrument. You’ll have a few opportunities to do this in our weekly work, especially with the Song Machine Assignment. 

In the second phase, with the help of a classmate, you’ll explode your piece of music, that is, you’ll break it down for us a la Song Exploder. After listening to a few episodes of Song Exploder you’ll soon discover that artists' approaches to making music vary tremendously. However, you’ll also notice that there is an interdependent relationship between realizing a musical idea and utilizing music technology to do so. Sometimes the technology itself seems to be the impetus for the idea, whereas other times the artist has a concept in mind that they try to realize by harnessing technology.

Your classmate’s role in this process is to interview and record you about your selected piece of music and how you made it. You need to do this with your session or stems within reach so that you can solo tracks to exemplify the concepts you’re discussing. In the interview, I suggest trying to cover a few (3 to 4) big ideas/concepts/strategies employed in the music-making process. After the interview process is completed you’ll want to edit down your recorded discussion to be 4-5 minutes long. You’ll then simply combine the dialogue and music into one audio file, and you’ll have created your very own episode to share with us. 
1 Comment

The Song Machine Assignment

3/8/2016

1 Comment

 
Picture
Updated June 10, 2016. Note: Prezi format is at the end of this post.

From John Seabrook’s The Song Machine (2015):
 
By the mid-2000s the track-and-hook approach to songwriting—in which a track maker/producer, who is responsible for the beats, the chord progression, and the instrumentation, collaborates with a hook writer/topliner, who writes the melodies—had become the standard method by which popular songs are written. The method was invented by reggae producers in Jamaica, who made one “riddim” (rhythm) track and invited ten or more aspiring singers to record a song over it. From Jamaica the technique spread to New York and was employed in early hip-hop. The Swedes at Cheiron industrialized it. Today, track-and-hook has become the pillar and post of popular song. (p. 200)

In track-and-hook, the production comes first, and then melody and words are added. Often producers are not looking for a single melody to carry the song, but rather just enough melody to flesh out the production. That’s why producers generally speak of a song’s “melodies” rather than its melody.

In a track-and-hook song, the hook comes as soon as possible. Then the song “vamps”—progresses in three- or four-chord patterns with little or no variation. Because it is repetitive, the vamp requires more hooks: intro, verse, pre-chorus, chorus, and outro hooks. (p. 201)

John Schaefer interviewed Seabrook about his book on WNYC's Soundcheck and listening to it might be helpful in making the concepts from the book more concrete:

Tangent: Easy (like Sunday morning)? ​
Picture
My only big qualm with The Song Machine is that there are times when Seabrook discounts the musicianship of the producer. For example, he writes:

CHR (Contemporary Hits Radio) hit makers can make all the sounds they need with musical software and samples—no instruments required. This is democratizing, but it also feels a little like cheating. By employing technologically advanced equipment and digital-compression techniques, these hit makers create sounds that are more sonically engaging and powerful than even the most skilled instrumentalists can produce. And it’s so easy! […] Whole subcultures of musical professionals—engineers, arrangers, session musicians—are disappearing, unable to compete with the software that automates their work.

First, producers are musicians and instrumentalists. The "technology" they use (i.e., the studio broadly defined) is their instrument. Second, what they do is not easy. If that were the case, wouldn't more people be successful at it? In my view, this approach to making music owes much its existence to the hip-hop producer. In Rhymin' and Stealin' (2013), Justin Williams writes that the “overt use of preexisting material to new ends” is fundamental to hip-hop culture and aesthetics. Failure to grasp this precept of hip-hop culture precludes the ability to discern the musicianship of the hip-hop DJ and its predecessors like the CHR producers profiled in The Song Machine. I can understand someone saying that CHR is not hip-hop, but that's not the point. The point is that CHR producers use a hip-hop approach to making music. Let's leave the last word to Joseph Schloss who argued in Making Beats (2004/2014): “if you believe that musicians should make their own sounds, then hip-hop is not music, but, by the same token, if you believe that artists should make their own paint, then painting is not art. The conclusion, in both cases, is based on a preexisting and arbitrary assumption.”

​Song Machine Example: Where Are Ü Now 
​What might The Song Machine process look like? I think the New York Times did an excellent job with their profile on Jack Ü's collaboration with Justin Bieber.

Note: I edited this video down somewhat to limit Bieber's screen time. For the purposes of this assignment I wanted my students to focus more on what the producers (Diplo and Skrillex) did (no offense Biebs). The article by Jon Pareles is also worth checking out.

The Song Machine Assignment​

Skills Called Upon: Digital Audio Workstation (DAW) skills, most notably creating and manipulating MIDI and Audio tracks. I could write an entire post alone on what that entails (and maybe I will...). To date, this is the best way I've come up with to facilitate the learning of DAW skills. 

Instruction to Students: This assignment will be done collaboratively in small groups of 2 or 3 people. Using the track-and-hook method of music creation, your group will create a hit song, or at least go through the process of trying to make one. This process requires a lot of trial and error and works in sequential stages.
 
Start: 
1. Form production teams of 2 or 3 
2. Give yourselves producer names and/or your team a name
3. Discuss your musical strengths. What can you do? Do you play an instrument? Do you sing? Do you write poetry? Can you press buttons (figuratively and literally :)? What do you want to be able to do? (Note: There's no sense it discussing what you can't do). 
4. Do you own any musical stuff? (computer, phone, guitar, a voice, etc.)
5. Musically, what are you into, and what are you most interested in making? 

Stage 1: Track

make: beat + vamp (simple chord progression/bass line)

What comes first the beat or the vamp? This tends to depend on the strengths of the producers and what they play. 

As a starting point, consider trying the following beat-first strategies:

1. ​play the circle with groove pizza (free & easy)...
Picture
or with patterning (iOS)...
Picture
​​2. play the grid with ableton push (expensive, more difficult, but lots of room for complexity)
Picture
​​with fl studio...
Picture
with Logic X's Ultrabeat....
Picture
with DM1 (iOS)...
Picture
or loop a time-honored breakbeat and  vamp over it. 

After the beat(s) is/are made, add the vamp(s):
  • go for short and simple
  • repetitive is good
  • you can even copy a chord progression verbatim from another song. Look it up on a guitar tab page 

Don't Write a Melody! (Yet)

Repeat this process X number of times for variety's sake. I typically require production teams to create as many Stage 1 tracks as there are people in the group. Making more tracks in this stage really helps with the next stage. 

Stage 2: Hook

Note: for this "machine" to work, everyone needs to complete the stages at the same time.


In the second stage, each group must "shop-out" their tracks created in Stage 1 to the other groups to find hook-writers, AND they must in turn audition other groups’ tracks and select ONE that they will write hooks for. In short, production teams swap their tracks with each other.

We now morph into hook-writers/top-liners. We write/record hooks on top of each others' tracks

Strategies for writing hooks: 

1. record everything. Don't miss a happy accident!
2. engage in sound doodling with voices or instruments
3. pay no mind to lyrics at this point, they're just placeholders (e.g. da doo run run)
4. the more hooks, the better

Other considerations:

struggling to improvise? try constrain-to-create strategies:
  • specify and limit pitches, durations, rhythms, range, etc. for a hook
  • make improvising hooks into a game of back-and-forth, one or two notes at at time, etc.
  • make a sound-alike hook, that is, something that sounds similar to an existing melody and then alter it to make it different

feeling awkward about singing random ideas amongst a group of peers? if we all do this together, like a workout class, it doesn't seem so bad. 

after the hooks have been recorded, they should be cleaned up enough such that they're presentable to another team. this simply means that upon listening to the combined track + hook, the hook-writer's ideas are presented as intended. no explanation should be required; another party receiving the tracks should be able to play them and get the musical gist immediately.  

once this is done, the newly recorded hook ideas are given to the original producers of the backing track

Stage 3: Produce

i. after receiving their tracks back with the new hooks added, the first job of the production teams is to listen through the hooks given to them and decide which ones they will further produce.

Questions to consider:
which hooks 'grab' your ears? is there an earworm to be found (an instantly catchy hook that stands out from the rest)?

after this initial listening, the production teams need to settle on a few hooks and get rid of the rest

Further Questions to consider:
Can the hooks be improved by editing? Remember, shorter is often better (long hooks aren't a thing!)

ii. timbre tinkering - the fun part! 

keep in mind that pop songs often feature predictable structures, but unpredictable timbres. prepare to spend a lot of time tinkering with the timbre of a hook. 

not sure how to go about messing around with effects? try playing FX Roulette

iii. structure

there are no set rules here, but a standard intro—verse—pre-chorus—chorus— or even a more stripped down verse—chorus structure makes for a solid start. Seabrook writes that if there is a bridge in a song it is often written later once the producers are confident they've got a hit on their hands.

iv. lyrics

once the structure of the song is set, the lyrics can be slotted into the appropriate places. Seabrook writes that Max Martin is less concerned about the meaning of the lyrics than how they flow and sound. 

v. finished?

at this point, there' still much that could be done, such as more recording, editing, and mixing, but how deep one delves into these processes depends on how much time can be dedicated to this assignment. 

Assessment

In the real world of contemporary radio hits production, assessment comes down to answering the question, is this song a hit? true = success; false = failure.

This is likely to be a problematic system for a lot of learners! A few things to consider:

For starters, be aware that the whole process is rich with formative assessment, and this is very much in keeping with with authentic real-world practice. All of those side conversations about the qualities of production from stage-to-stage are representative of what professional producers do. Although we have a crude formula to emulate the song machine, the reality is that there is no rubric for a hit. There is much art to this science. 

What I do: I have my students keep a learning (b)log and make song exploder episodes to break down their processes (see my blog for posts on both). 

bottom line: 
I want to know what they know they know!  

​Oh, and one last thought from Seabrook: “In both volume of hits and longevity, Max Martin eclipses all previous hit makers, including the Beatles, Phil Spector, and Michael Jackson.”

​Genius?
Picture

Link to Prezi: ​http://prezi.com/3e7k589txwzy/?utm_campaign=share&utm_medium=copy&rc=ex0share
1 Comment

MaKey MaKey Instrument Invention Part III: Constrain-to-Create

3/7/2016

1 Comment

 
Whereas Part I and Part II focused on getting things working and producing sounds, this post concentrates specifically on the design process. As a starting point, the Prezi below may be helpful for thinking about designing instruments. For me, my background is in special education, so disability theory/disability studies really resonates with me and has a significant influence on how I frame learning experiences. Maybe it will help you too...

There are two theories that I find particularly helpful in guiding design. The first is conceptual and guides thinking, whereas the second is prescriptive and guides action. 

1. The Room Metaphor (Seymour Papert, Mitch Resnick)

Low Floors: It's easy to enter the room
High Ceilings: There is room for complexity
Wide Walls: There is room for everyone, and there are many points of access
The Room Metaphor is helpful in thinking globally about design.* I often write these three principles on index cards and hand them out to groups so they can revisit them as they develop their designs. Essentially, these are questions designers must ask themselves:

1. Is it easy to enter the room?
2. Is there room for complexity?
3. Is there room for everyone, and are there many points of access?

Know that there is no such thing as a universal design, try as we might to achieve such a thing. By asking themselves these questions, designers should be aware not only of how their designs can enable, but also how they can disable.

*big thanks to Eric Rosenbaum (co-creator of the MaKey MaKey) for giving me a crash course on the Room Metaphor for design.

2. Iterative Design Cycle (Don Norman)
Picture
The MaKey MaKey is a prototyping device and a quick glance at Norman's iterative design cycle suggests that by starting with the MaKey MaKey we're skipping some key design steps. In actuality when you start right away by prototyping you are integrating the first two steps of observation and idea generation, but perhaps less methodically.

The reason Part I & II of this workshop series starts with the MaKey MaKey is to get learners comfortable with the device itself. In the process of doing so—in a constructionist way of trying out different conductive materials to test functionality—we may call upon experiences (which involve observation) and these can lead to ideas to prototype. While it really depends on the group of learners, in my experience this initial phase of discovery and playing usually runs its course after 1 to 2 hours. There are some learners (such as myself) that are quite content to continue on in this way, but in my experience many learners eventually hit a point where the novelty wears off and disengagement starts to set in. This is actually a good thing. As wonderful as the MaKey MaKey is, we don't really want the workshop to be about it because it is simply a conduit to helping us design new instruments.

Enter Norman's iterative design cycle. We can see that human-centered design ought to start with observing (which includes dialoguing with) people to identify their abilities and needs. From there we develop ideas to meet these abilities and needs and build prototypes of these ideas to be tested by the very people we design for. As Norman says, repeat this cycle until satisfied. Ideally, we can go out into our respective communities and do just that. But what if we can't for whatever reason? What else can we do? 

Constrain-to-Create Cards

For some people (such as myself) being told, "dream it up!" is just what I want to hear. If you're working with a learner who has that mindset, I encourage you to let them do their thing. For those who would like more direction, I provide design prompts in the form of constrain-to-create cards (I really like alliteration). The idea behind these cards is that as you add them together, the design task becomes more specific, thus constraining the channel in which to create. I find some groups just want one card to get started, whereas others are happy to take a stack to try out multiple ideas and combinations before they settle on one direction for their design. So far I've come up with four categories for these cards:

1. Population (the most important in human-centered design)
2. Context
3. Mechanism/Motion/Action
4. Material(s)

I differentiate the categories using different colored recipe cards, but sticky notes work really well too. 

The picture below shows some of the ideas I've used (and not all of them could fit in the frame), but please add more and tell me so I can use them!

You can add the cards together within categories and across. Typically the more cards, the more constraints there are to consider. So, for example you could select the cards Wheelchair + Playground + Rolling + Squishy. That's a tall order, but it can be done! What might an instrument be like played by someone in a wheelchair at a playground that involves a rolling motion to play something squishy? There are lots of right answers to this question. 
Picture
If you or some of the learners you guide enjoy the element of surprise or are indecisive, why not try an approach incorporating chance? You can use a site like wheeldecide.com to make choices for you. Below is a quick prototype of how this idea might look (sorry, couldn't resist!). Instead of having card categories you could just create more wheels. 

Age Cohort

Context

1 Comment

David Bowie's Mic Technique on "Heroes"

1/11/2016

0 Comments

 
Heroes

The following description paraphrases Bowie's Producer Tony Visconti:
 
Each mic was linked to a gate set to open only when the signal was within a certain range. If Bowie sang softly, only the close mic was operational; at medium volume, the second mic ten feet away kicked in; full-throated singing would open up the third gate. The effect, which can easily be heard on the title track of Heroes, is to add more room tone (natural ambience) the more the singer projects. The effect is not the same as simple reverb; the gate cuts off the reverb tail, so that what the listener is left with is a strange, otherworldly quality to the vocal. 

- From Virgil Moorefield's The Producer as Composer ​(2005/2010, p. 52)
Young Americans

Bowie had this to say about his performance of "Young Americans" (recorded at Sigma Sound Studios in Philadelphia) in the 1995 PBS documentary "Make it Funky":

"I kind of, you know, tried to do my own version of my interpretation of that kind of music and it wasn't authentic at all. I think my stage movements kind of resembled a rather spindly wooden top, I think was kind of my version of James Brown movement"

I'd argue it has its own kind of authenticity...(dancing is @ 4:20 in the video below)
Low

 From Tony Vicsonti's autobiography (2008), paraphrasing Bowie before the making of Low in 1976:

"Look Tony, before we start recording I have to say this is strictly experimental, and that nothing might come of it in the end. Are you prepared to maybe erase a month of your time?"
 
Visconti goes on to say:

"True to form there were no melodies or lyrics, just grooves and chord changes. David called them 'demos' but I recorded them carefully, knowing full well that these could end up as masters, and they did."
0 Comments

MaKey MaKey Music Instrument Invention Part II: The Workshop

10/14/2015

1 Comment

 
Read Part I first!

​The Workshop

Phase I: Play with the MaKey MaKey to figure out how it works

The kits vary somewhat, but all should have something resembling the photo below: (1) the MaKey MaKey itself, (2) a usb cable to connect it to your computer, (3) alligator clips, and (4) connector wires. 
Picture
1. Do: Let's get these things plugged in and working!

So what does this thing do? Not much, and yet, so much at the same time. It tells your computer, "Hey, I'm a keyboard! You can use me instead of the arrows keys, some of the letter keys (W, A, S, D, F, G), the space bar, and the mouse click."
Picture
​​The classic example is to use a banana as a spacebar, but anything that conducts electricity can be used as a substitute. Let's see if you and your group members can quickly make a space bar with one of the materials you brought to the workshop. Start by going to the official MaKey MaKey 'how-to' guide CLICK HERE and follow the first 5 steps.
Fun, right? You've now learned how the MaKey MaKey works and there's not that much more to it. What makes it truly cool is you and we'll be harnessing our collective coolness to create musical instruments in the second phase, but first let's figure out how to get these things to make sound.

2. Do: CLICK HERE and choose any one of the software instruments. If you still have your spacebar connected you should be able to generate sound immediately. Now it's time to get out those alligator clips and add more buttons for more sounds.​ I recommend that you demonstrate you understand how to trigger multiple sounds with multiple buttons by making the following:
  • bongos (2 buttons)
  • 5-key piano (5 buttons)
  • Synthesizer (Use at least 8 buttons)

Note: I have yet to specify how to go about designing the physical music interface itself for any of the above examples. I'll cover my strategies for this in the next post. For now, I'm mostly concerned with making sure that participants grasp how the MaKey MaKey can be used to produce sounds.
Adding Complexity: Programming Customized Sounds with Scratch, Soundplant, and Max

Scratch


Scratch is a free programming language we can use to customize the sounds our instruments produce. Start by going to the Scratch site scratch.mit.edu and create a free account so that you can save your work. Below I've provided step-by-step screenshots to show how to use the sounds in Scratch (or how to record your own in scratch) so that you can trigger them with a MaKey MaKey.

1. Do: Turn your MaKey MaKey into a meow machine:
Picture
Picture
Picture
2. Do: record your own sounds:
Picture
Picture
Picture
3. Do: make a simple drum machine:
Picture
Soundplant

Soundplant, "the computer keyboard sound triggering software," seems like it ought to be the perfect match for the MaKey MaKey, and in many ways it is. For starters, it's free (!) and you can get it here. ​

There are two things I do with Soundplant. The first is to simply assign sounds to keys. I've provided two screenshots below to outline how to do this.
Picture
Picture
To add a level of complexity, you can take one sound sample and assign it to a key using Soundplant, and then assign it to more keys but with a different pitch. For example, in theory you could recreate the sound of an entire piano by only sampling one key/pitch. 

In the example below, I assign a sample to one key and then shift it up by semitones across two more keys so that I can trigger F, F#, and G major chords.
Picture
Picture
Picture
Picture
1 Comment

MaKey MaKey Music Instrument Invention Workshop Part I: Preparation

10/5/2015

1 Comment

 
Preamble: I've done a lot of MaKey MaKey music instrument invention workshops over the past few years and my hope is that this series of posts will provide the same information to learners that I do in person. Please feel free to get in touch if anything I've written doesn't make sense or I can help you in any way: [email protected]

Pre-Workshop: The first step is to come prepared...

1. Household Stuff

The adage, "many hands make light work," is apt for a music instrument invention workshop using MaKey MaKeys. In short, if everyone brings a few things we'll have lots of resources with which to tinker. Many materials will work with a MaKey MaKey, but only if they can conduct an electric current. Below are a few ideas/suggestions:
Here is what the people at MaKey MaKey say on their website:

Conductive Materials
Here are a few things to try:
  • Most fruits and vegetables work great.
  • Lots of other foods work too. We've tried marshmallows, gummy candies, macaroni and cheese, cupcakes, shrimp, and lots of other things.
  • Plants can work too. Try some leaves or flowers, but nothing too dry.
  • Play-Doh, Model Magic and other clays work very well as long as they stay moist.
  • People are conductive! Connect one person to ground, and another to an input, and you can trigger sounds when they high-five.
  • Graphite from a pencil can work. Make thick, dark lines, and be sure to draw on a smooth surface.
  • Foil and other metal objects will work. Try out coins, magnets, nuts and bolts, forks and knives, or pots and pans.
Beyond conductive materials, it's helpful to have connecting materials like tape, glue, and string.
Again, a few more tips from the MaKey MaKey people:
​​
Craft Materials
When you're inventing, anything goes! Here are a few things we have enjoyed using:

Inflatable beach balls, paper plates, cardboard boxes, various types of soft and rigid foam, lego bricks, plastic storage boxes, stuffed animals and other toys, funny hats and other pieces of clothing, sheets of fabric, string, yarn, elastic, and paper.

It's also important to have around some tools for cutting, like scissors and exacto knives, and ways to stick things together, like hot glue, superglue, various kinds of tape, and clips or clamps.
2. Computers and an internet connection

If you have a laptop please bring it. We'll be using browser-based software, which is free and requires no downloading, but an internet connection is required.

3. Excitement! 

Here are a few videos to check out that will hopefully get you excited about the possibilities of what we can make together:
1 Comment

FX Roulette: A Brief Guide

8/2/2015

30 Comments

 
                                   "There is no such thing as wasted time spent messing around with new effects" 
                                                    - Bruce Swedien (the guy that gave us all of those awesome Michael Jackson mixes)

What is FX Roulette? 

A game designed to learn how audio effects work.

Why should I play FX Roulette with my students?
It's a fun way to obliviously improvise and compose music at the timbral level. It also fosters the development of music literacy, and the skills associated with remixing as pioneered by King Tubby in Jamaican dub music.

What do I need to play this game with my students?
1. A digital audio workstation (DAW). I endorse Soundtrap (soundtrap.com) because it's: (a) free, (b) web browser-based (no install needed), (c) works on mac/windows computers AND also iOS/Android tablets and phones, and (d) comparable to GarageBand, which many music educators are familiar with already. 

Note: You don't need a people-to-device ratio of 1:1. Partners and groups of three can work really well. 

2. Headphones. Not absolutely necessary, but nice to have.

3. A timer like this: http://www.online-stopwatch.com/eggtimer-countdown/full-screen/

4. A randomizer like this: http://www.classtools.net/random-name-picker/86_UQEc9Z

How do we play the game?
Note: This is the 60 minute beginner version, please adjust accordingly. I introduce this game after students have had a chance to learn some DAW basics using Soundtrap, mainly creating multiple tracks using pre-made loops (Soundtrap has many of these for free). 

Step 1 (10 minutes)
The game hasn't started yet, this is setup time. If possible a circle or horseshoe formation in the room with everyone facing inward is best (this works if everyone has a laptop/tablet/phone, but in my case I teach in a room with desktops, so we face outward in a horseshoe formation).

There are many different directions you can take the game depending on what existing music you choose to remix, but for the beginner version I like to have students create 'insta-songs" using 4 loops to create 4 tracks. 
Picture
Picture
Once everyone has their 4 tracks, explain how to add an effect. In Soundtrap this is very straightforward. 
Picture
Picture
Step 2 (The Game: 30-35 minutes)
Using the randomizer, we draw the first effect to be used. After each round we remove this effect so that it cannot be drawn again. Feel free to add more effects to the list, but like all good casino bosses, my version of FX Roulette is rigged—I ensure the effects I want my students to play with get used by limiting the options.

Rotation Option: To introduce more controlled chaos into the game, I like to have my students rotate computers after every round. 

Here is the sequence of rounds:

- Round 1 (10 minutes)
- Round 2 (8 minutes)
- Round 3 (5 minutes)
- Round 4 (3 minutes)
- Round 5 (2 minutes)
- Round 6 (1 minutes)
- Round 7 (30 seconds)

Step 3 (Optional Final Remix: 5 minutes)
Give 5 minutes for students to return to the devices they started on and make final adjustments to their compositions. 

Step 4 (Group Listening: 10 minutes)
To wrap up the session invite your students to play their creations. Follow up with some questions about what effects they liked using best and what they perceived those effects did to the tracks. This is a great opportunity to have some discussion about the qualities of sound.

Version 2
Instead of having everyone do the same effect at the same time, we each pick an effect that we commit to for the duration of the game. I like using name tags (as shown below) or cue cards that we draw from a shuffled deck so that it's a surprise. In each new round we go to a different device and work our effect's magic. We become experts with our respective effects by being forced to explore how they will work within different mixes. Then, when we go back and listen to everyone's compositions at the end of class, we can hear the influence of each other's creative uses of effects.
Picture
30 Comments

Faster Interview Transcription Part II

6/19/2015

1 Comment

 
This method works best with structured and semi-structured interviews. I use ScreenFlow, a basic but excellent screencasting program for mac. (Fair warning: screencasting a Skype interview consumes a colossal amount of storage.) Because screencasting a Skype conversation records two different sources of audio (your microphone and the interviewee's microphone), you get two separate audio files. In the photo below you can see precisely when I (Adam) ask a question and when the interviewee (Eric) responds. If you're somewhat accustomed to seeing audio displayed as a dynamic waveform as pictured below or from using Soundcloud, or a digital audio workstation (DAW), it's fairly easy to tell the difference between a few sentences strung together and a brief interjection. Below I've annotated a screenshot to show an example of where I asked a question and briefly interrupted Eric's response with a "yeah."

So how does this save time? If your interview has some structure (again, structured and semi-structured interviews are the most compatible with this method) you can simply glance at the waveforms and know when you asked a question. If you followed your script, you should have a good idea of where in the timeline you asked a specific question. You should also be able to discern the difference between an improvised prompt (e.g., "Tell me more about that.") and a question based on the length of the waveform. Jotting down a few cue points during the interview will help with this too. If you decide in your analysis to focus on specific questions/topics, you can expedite your process by only transcribing the responses to those questions. 


The interview doesn't have to be conducted online to get the two separate audio files, but you need to have two microphones recording to separate tracks on a DAW to do this with an in-person interview. And, to state the obvious, you don't get the video data (unless you go all out and wear a GoPro).  
Picture
1 Comment
<<Previous
Forward>>

    adam patrick
    bell

    music educator & reveler

    Archives

    January 2021
    July 2020
    April 2020
    July 2018
    December 2017
    November 2017
    October 2017
    August 2017
    April 2017
    January 2017
    July 2016
    April 2016
    March 2016
    January 2016
    October 2015
    August 2015
    June 2015
    January 2015

    RSS Feed

    Categories

    All